


Bathroom Waterproofing Membrane Installation
A beautifully tiled bathroom can conceal a serious defect for months. Water passing through grout joints, around a shower valve or beneath a poorly detailed tray edge may not show itself until timber swells, plaster stains or neighbouring rooms are affected. Bathroom waterproofing membrane installation is the protective work that sits behind the finish - and in a premium bathroom, wet room or spa setting, it deserves the same level of care as the visible tilework.
Tiles, grout and silicone are not a waterproof tanking system. They are finish materials exposed to daily movement, cleaning, temperature changes and repeated wetting. The membrane, its joints, corners, penetrations and connection to drainage are what determine whether the room performs over the long term.
Why bathroom waterproofing membrane installation matters
A tiled shower enclosure is a high-risk area. Water can track through grout, behind silicone and around pipe penetrations, particularly where large-format porcelain has been installed with narrow joints that make the surface appear almost monolithic. The fewer joints may improve the visual result, but every change of plane, fitting and drain remains a technical detail that must be correctly sealed.
In a conventional bathroom with a tray and limited splash exposure, waterproofing may be concentrated around the shower enclosure and bath. In a level-access wet room, the entire wet-zone assembly needs a more considered approach. The floor must fall accurately to the drain, wall-to-floor transitions must remain watertight, and the membrane must work with the drain flange rather than merely stopping short of it.
This is not simply a safeguard against leaks. It protects the substrate from saturation, helps preserve adhesive bond strength and reduces the risk of mould or damage within concealed construction. On hotel, leisure and multi-bathroom developments, where rooms are used intensively and access for repairs is disruptive, that protection is fundamental to the specification.
Selecting the right membrane system
There is no single membrane suited to every bathroom. The correct choice depends on the substrate, the drainage arrangement, tile format, anticipated movement and whether the room is a domestic shower room, commercial changing area, wet room or spa environment.
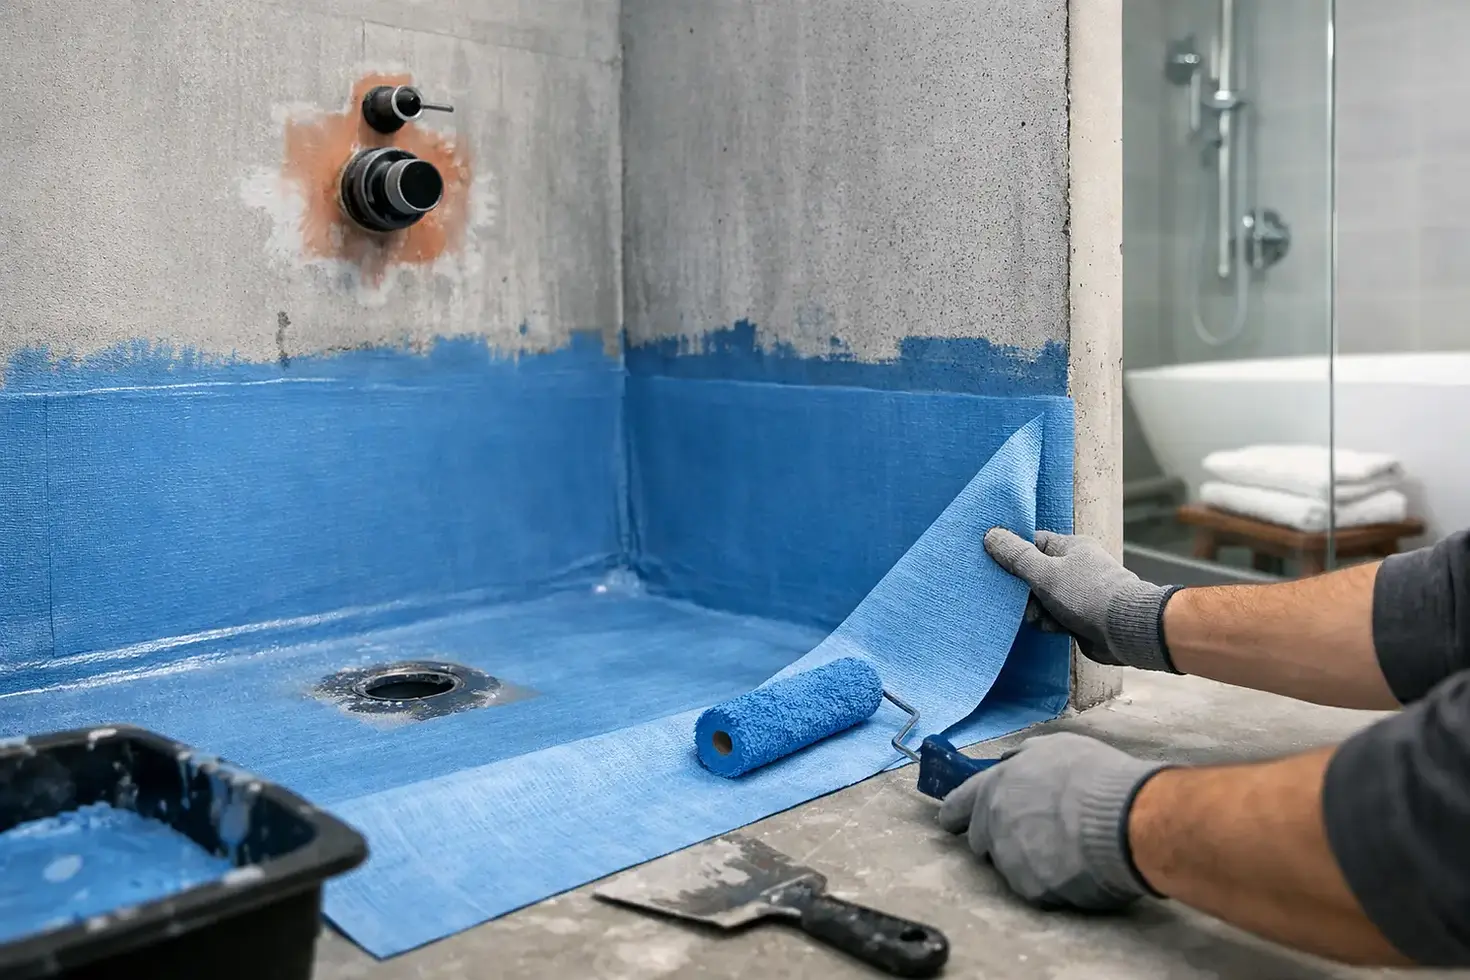
Liquid-applied membranes are often appropriate for sound, stable backgrounds and detailed areas. They are brushed or rolled on in controlled coats, with reinforcing tape at corners and junctions. Their quality relies on achieving consistent coverage and the manufacturer’s required dry-film thickness. A coating applied too thinly, or allowed to bridge an unprepared crack, can compromise the whole assembly.
Sheet membranes offer a controlled, uniform waterproof layer and are particularly effective where precise junction detailing is required. They are bonded to the prepared substrate with the compatible adhesive or mortar, then lapped or sealed using the system’s specified banding and corners. Pre-formed internal and external corners can provide a neater, more dependable result than trying to fold or overwork flat tape around complex geometry.
Decoupling and waterproofing membranes may be specified where movement management is a major concern, such as over certain screeds, heated floors or large tiled areas. They can help accommodate minor stresses between the substrate and finish, but they do not remove the need for correct movement joints, proper substrate preparation or suitable adhesive coverage.
The assembly must be treated as one system. Mixing tapes, sealants, primers and adhesives from unrelated products can create an untested detail, even when each item is individually high quality. On demanding projects, the membrane specification should be agreed alongside tile size, substrate build-up, underfloor heating, drainage and edge details - not selected after the walls have been boarded.
Prepare the substrate before any membrane is applied
Membranes follow the surface beneath them. They cannot correct an unstable wall, a dusty screed, a poorly formed fall or a timber floor with excessive deflection. Preparation is where a reliable installation begins.
Walls should be flat, secure and compatible with the planned system. Cement-based tile backer boards are commonly used in wet zones because they are stable and moisture resistant, but the board joints still require treatment. Standard plasterboard is not a suitable background for the direct wet area of a shower unless a manufacturer-approved waterproofing build-up has been designed around it.
Floors need equal attention. A wet-room floor requires consistent falls to the drainage point, with no local hollows that can retain water. The precise gradient depends on the drain, tile size and room layout, but the objective is clear: water must move confidently to the outlet without creating awkward cuts or lipping at the tile surface. Large-format tiles can look exceptional in a wet room, although smaller formats are sometimes the practical choice around linear or point drains where falls change direction.
Before priming or tanking, surfaces must be dry, clean, dust-free and fully cured. Adhesive residue, weak laitance on screed, loose paint and surface contamination can reduce adhesion. Any cracking, unevenness or movement should be assessed rather than covered over. A premium finish cannot compensate for a poor background.
Plan every penetration and transition
The points where one material meets another are usually where failure begins. This includes wall-to-floor junctions, internal corners, shower-screen channels, pipe outlets, niches, benches, mixer valves and drains. Each needs to be considered before the membrane work starts.
Pipe penetrations should receive purpose-made sealing collars where the system provides them. A bead of sealant around a pipe is not an equivalent replacement, particularly behind a concealed trim plate. Recessed niches need full waterproofing across their base, sides and corners, with careful consideration of falls so water does not sit on a horizontal shelf.
At shower trays, baths and linear drains, the membrane must connect to the appropriate flange, upstand or sealing strip. This detail varies by product. Getting it right requires following the drain or tray manufacturer’s sequence, not relying on a general-purpose approach.
The installation sequence that protects the finish
A disciplined sequence prevents trades from working against each other. Once the substrate has been prepared and primed where required, the installer applies pre-formed corners, junction tape and sealing collars before coating or laying the main membrane. This reinforces the areas most vulnerable to movement and water ingress.
For liquid systems, the membrane is applied in the required number of coats, allowing the specified drying time between each. Coverage should be even, with no pinholes, thin patches or missed sections at board joints and corners. For sheet systems, joints are lapped or banded to the stated width and pressed firmly into the bonding layer so there are no voids or lifted edges.
The waterproof layer should extend beyond the immediately obvious splash zone where the room design warrants it. In a compact shower room, that may mean tanking the full enclosure and floor perimeter. In a wet room, it commonly means creating a continuous protected envelope across the floor and up the walls in the defined wet areas. The extent should follow the room’s use, not the minimum amount of material that can be applied.
Once cured, the membrane must be protected from damage. Other trades can easily puncture it with fixings, ladders or tools. If accessories, screens or cabinetry require mechanical fixing in a wet zone, the fixing method and sealing detail should be agreed in advance. Drilling through completed tiling without understanding what sits behind it is an avoidable risk.
Tiling over the membrane
The tiling stage should respect the waterproofing system beneath it. Use a compatible flexible adhesive, select the correct trowel size and achieve appropriate adhesive contact across the back of each tile. This matters especially with large porcelain, stone-effect slabs and heavy natural materials, where voids can weaken the finish or create areas vulnerable to impact and moisture retention.
Movement joints remain necessary at perimeters, changes of plane and locations dictated by the substrate or building structure. These are not cosmetic compromises. They allow the tiled finish to respond to normal expansion, contraction and building movement without transferring stress into the membrane or tile edges. Colour-matched sanitary-grade sealant can make these details discreet while retaining their function.
Grout is selected for the tile, joint width and service conditions, but it should never be sold as the waterproof layer. Even high-performance grout benefits from the protection of a correctly installed membrane behind it.
Common shortcuts that lead to remedial work
The most expensive failures often stem from small omissions: tanking walls but not the floor junction, stopping the membrane short of a drain, failing to reinforce corners, applying liquid membrane too thinly, or using incompatible products. Another common issue is installing a membrane over a substrate that has not dried or cured sufficiently, trapping moisture and undermining adhesion.
There is also a commercial pressure to treat waterproofing as an invisible cost. That is a false economy on a room where plumbing, joinery, premium tiles and finished decoration may all need to be removed to locate a leak. The membrane is hidden, but it is one of the most valuable components in the room.
For high-specification bathrooms, the best time to inspect waterproofing is before tiling starts. Ask to see the prepared substrate, the drain connection, the corner treatment and the completed membrane coverage. Those details will never be as visible as a mitred porcelain edge or colour-matched resin finish, but they are what allow the finished room to remain as impressive after years of use as it is on handover.


Comments